Showing posts with label interiors. Show all posts

Sunday, 9 August 2015

Show me your best side (table)...

This blog post has been a long time coming - being caught up in the reality of timescales for uni work and a little design brief I'm working on has meant it's been tough to actually get this one down. 
It is one I have enjoyed writing though as it kind of speaks for itself and, for a change, means I don't actually have to do much gabbing! 

So I'm working on a little interior design brief that I'm quite excited to share with you all, however I'm going to wait until it's completely finished to show you the reveal and transformation. Along with very specific mirrors and wall finishes, I have been trying to source small occasional/bedside tables. 

These kind of occasional tables can be so boring yet if chosen correctly, can bring so much more than just utility to a room. 

Use occasional tables in hallways to create a really grounded SENSE OF SPACE, rather than it becoming a 'corridor' (zzzzzzz). 
OR...
dot them in unexpected places like besides your bathtub to house charming vignettes, or in the kitchen to display your cookery books. Wherever you put them, you'll find that they instantly transform your spaces - creating levels of intrigue way up the cool ladder.

Also if you choose tables that can work in multiple rooms within your home, they become the easiest and most brilliant way to instantly give your space a makeover. Frequently playing around with your furniture and 'bits and pieces' (or STUFF as Craig likes to call it) will stop YOU becoming bored of your home and will aid you on your way to creating one you never want to leave!

Here are my pick of just a few fab tables on the market - remember, don't just push them in the corner!

For retro cool go Vettra - Ikea £25


For instant understated classic vibes do Undredal- Ikea £95.


Theres place for country chic in most homes, practical and gorgeous - Manilla tray - Joss and Main £64.95


Love this leggy little number, simple and chic - Beat side table - Joss and Main £91.95


Totally in love with this quirky bird leg table, it's gold finish is the icing on the cake. Birdy urban outfitters £80
Add humour and charm to any room with this little fella,, also available in a beauty of an Elephant- Kare Bear Urban Outfitters £120 


C'est Chic! Timeless and gorgeous in any space, especially against dark walls!- Hexagon - Urban Outfitters £120


Add mono pattern to spaces with are full of colour or depth - Chevron table - Mia Fleur £150


Make a design statement with Lean to side table - Heals £95


Hit the copper trend on the head with this beauty, the hammered texture will juj up the dullest of spaces Orrico - Habitat £125


Girls' girls - this ones for you - Gold and Pink stripe  - Homes Direct £199.99

There is a little bit of something for everyone here, and as much as I genuinely love them all, I think you can't beat a little bit of quirk and glamour in any space so my faves are Kare Bear and Birdy Both by Urban Outfitters which have a huge selection of some of the best home accessories (credit cards at the ready girls).
 Which is your fave and where would you put it? Or if you have a pick to add to the list, let me know over on Facebook or Twitter.

Happy Sunday.
XOXO.

Wednesday, 29 July 2015

When only hot chocolate will do...

Good morning world, we're half way through the week (almost), and I'm about 100% certain that if this great British summer continues I will probably drink my bodyweight in hot chocolate (I'm all about creature comforts!) Trying to battle through the rain snapping pics on the beach battling the elements I think I earned it anyway!

In Sundays post I mentioned I'd share with you a few design layouts I've been dabbling with for my own practice (were thinking about working towards Christmas fairs). They are super simple, as I prefer to work with placement prints and play around with colour. I have mainly been working on cushion layouts but this design could be manipulated to suit other products such as lampshades, throws, tea towels and mugs.

Please let me know what you think as I'd love to get an idea of how well received this kind of look is. The backgrounds are work in progress too, I haven't gotten around to this yet but I'd like to work some hand rendered grounds in but for now I have simply selected one flat colour...


XOXO
All designs belong to LillianDaph and are subject to copy-write. 

Sunday, 21 June 2015

Finally Finished...

Happy Fathers day!!!
So it's been a while, sorry about that. Since finishing uni for the summer I've bagged myself a really exciting internship with artist Gillian Arnold (which I'll ramble on much more about soon), and despite it being amazing and really inspirational it is unfortunately taking up most of my days, hence the lack of LD presence on the social media scene.

Today I'm back though to FINALLY share with you our FINISHED - yep you heard me, FINISHED bathroom! And how excited I am to do so. So kick back after chilled Fathers Sunday with a full belly and cuppa in hand and enjoy this post as much as I am enjoying sharing it with you. I only wish I had before pictures ( no idea how we missed that bit, I think Craig was just so eager to rip the tiles off the walls!) so I will briefly help you conjure and image in your mind...

...Think pale blue and yellow STRIPEY wall tiles, complete with large blue bow motifs FROM FLOOR TO CEILING ON EVERY INCH OF WALL, complete with a yellow painted ceiling. There was only a corner bath, toilet and sink with built in cupboard underneath in here previously. That was pretty much it - old school as you like.

I wanted to create a grown up, laid back room that would make me want to never leave the bath tub. Nothing majorly structurally went on in here, but here is a quick run down of what we have done:

- Ripped off wall tiles (much to Craig's delight)
- Knocked out a small cupboard that was in the hallway and blocked up the door to create enough space for a shower cubicle.
- Moved the corner bath from right hand corner and replaced it with a new one directly under the window
- Moved toilet from under the window to right hand wall so that the toilet and sink sat along one wall creating more space.
- Used an old free-standing pine unit to house a countertop basin- replaced the wooden knobs with white ceramic ones from h & m
- Tiled behind shower cubicle - shower and cubicle were new additions
-  Created an oak shelf to sit on top of boxed in bath pipes
- Painted the walls in Abigail Ahern by Craig and Rose 'Overtly Olive'
- Replaced old yellowy vinyl flooring with new black and white vinyl

Voi la...

The wall colour felt really quite dark when it went on and stood mainly alone, but plenty of lighting and the white touches brighten it right up. (Look out for a post soon on lighting tips.)

I love this alternative style chandelier from John Lewis, I wanted a feature light above the bath and this adds the touch of black that I was looking for. It also casts really gorgeous shadows...


All of the accessories here are from h and m. Plants and pots all Ikea.

 We sourced this lovely reclaimed radiator from a salvage place in Tynemouth, it came fully finished as in the picture.
The mirrors were complete bargains from TK Maxx! I liked the idea of not going for the typical one mirror above the basin and using two means I get to have my own at the perfect height for me, and Craig gets his own too. We are toying with the idea of hand painting 'his' and 'hers' in black scroll above them - haven't quite decided on that yet!

We sourced the shower, basin, bath and toilet from James Hargreaves in Stockton. I couldn't recommend them enough. We looked around loads of bathroom places and they were either totally overpriced or seriously bad quality. The stuff we got from them is really good quality which is obviously totally important when it comes to the technical stuff! They had a nice showroom too so you can sit in the baths and try them for size rather than just picking from a catalogue - don't judge me if I'm laying in it it needs to be comfy, right?


I was really keen on using marble in the room somewhere as I knew it would bring a touch of timeless glamour. These beauties were from Topps Tiles, placing them in a herringbone pattern adds a touch of needed pattern to the blocks of wall colour. Again the lightness they provide the room with lifts the depth of the olive paint colour. Despite wanting gold/ copper fittings, I was talked out of them by Craig. I do wish I had put my foot down on that matter though but it was going to work out more expensive so I gave in. That is probably the only thing I regret about this room- maybe in 15 years when we do it all again!!!

So there is still some finishing touches to add, I want to hang some art, get some rugs and add a little stool by the bath but for now I'm so happy to this room pulled together. It is EXACTLY what I wanted it to be. I hope it has inspired you to take a few risks with your own bathroom, even if just a lick of paint.

I'm off in the tub!

XOXO
P.S if you didn't catch the last post on bathrooms, click here to head on over. Please feel free to comment, would love to hear your views or about your own bathroom projects! Don't forget to follow LD on Facebook and twitter if you don't already!

Sunday, 31 May 2015

Battling with bathrooms...

Good morning world, well actually I think I have missed the morning today I am quite behind the usual Sunday morning schedule - since hand in at uni I have not really stopped and I think it has finally caught up with me.

Anyway I'll quit winging now and get back to the blog, I realise I've lost touch a little in the last few weeks but the truth is I actually have no excuses. I have simply been busy living. Which sounds ridiculous but seriously life is time consuming isn't it? When I was busy with Uni work the little things would go out of the window, like mopping my floors and ironing, and now I have no stressful deadline to work towards, somehow I have upped the anti in completing the day to day jobs stakes, and quite frankly it's neither exciting or rewarding so I'm intent on applying myself to the things that make me happy and feel productive - like blogging. 

So today we have the bathroom guy in finishing off what we started around two months ago. I'm not complaining as he is a friend doing us a favour, which is brilliant for saving up the pennies, but it does require a dose of patience. I'm so excited to share this reno with you guys, although I am a little gutted that we don't have proper before pictures as this room has had a good overhaul. Hopefully it will be done within the week so I'll pop up a 'Voi-la' post then, but in the mean time it has made me do some reflecting on the bathroom journey.

Bathrooms are hard. Period. 

They can be so standard can't they? Like seriously when we started looking I just felt completely uninspired. We shopped around the usual bathroom places, the majority of which actually made me feel quite nauseous and frustrated at the time we were wasting. They were full of the same plastic-y looking fixtures and fittings that sparked no lust whatsoever. Why are bathrooms like this? I mean I get that they have to be functional of course, but would you kit your bedroom out in white clad plastic units? Didn't think so.

Fuelled with strong hatred for standardisation (I've never really been into standard- just you ask Craig) and armed with new insights into design, I made it my mission to design a bathroom that looked like it belonged to us. It's a hard thing to fight is standardisation, because unless you have the audacity to question the norm, it's so easy to be swallowed up by the sea of what seems to be the only possibility.

I'm telling you this, YOU MUST CREATE YOUR OWN POSSIBILITIES.

The bathroom designer from the standard bathroom showroom will tell you that you couldn't possibly  put those extra large taps over a sink, and the bathroom fitter will tell you that you need fitted cupboards for all of your essential bathroom items. 

SOD THEM. 

YOU KNOW HOW BIG YOU'D LIKE YOUR TAPS TO BE AND I'M PRETTY SURE THAT YOU CAN WHITTLE DOWN YOUR BATHROOM CLUTTER IF IT MEANS YOU CAN HAVE A BEAUTIFUL FREE STANDING UNIT TO HOUSE YOUR SINK.

Your bathroom does not have to look like every single other bathroom in England. It is simply another room in your house. Treat it like you would your bedroom or your living room. Fill it with all of your favorite things, hang pictures on the wall, house it with accessories and furniture. 

MAKE IT A SPACE THAT YOU NEVER WANT TO LEAVE.

Clearly this is a subject I am passionate about (sorry for the rant I told myself this would be a short post), I feel I have a lot a personal experience in this department - our bathroom guy even told me I shouldn't be painting the walls the colour I have! But it has really opened my eyes into bathroom design, I feel it's such a shame when you visit a lovely home with welcoming decor then you visit the bathroom and it looks just like every other bathroom you have been in. 

I'll follow this post up with pics and a write up of exactly what we have done in our bathroom, but in the mean time get shopping for some lovely homely pieces for your own bathroom, dig out some artwork and hang it by your shower, and fall in love with your bathroom.

Happy Sunday

XOXO

P.S if you really are going to shop, H & M have some fab cheap accessories, as do Urban Outfitters and the gorgeous online shop MiaFleur

Saturday, 16 May 2015

Our kitchen...

So since I've been sharing our home reno's with you guys I'm not entirely sure how I've missed out the kitchen - although I think it could possibly because its not my favourite room in the house and in 'reno' terms we haven't actually done any really. But anyway, I thought I'd share with you a few snaps, the biggest thing we have changed in here is the flooring. The kitchen is completely solid wood and is really beautifully made however, for me, THERE IS A LOT OF WOOD. You can imagine how it was when the flooring was in the same wood too - wood overkill! 

We have toned it down a little with a stone effect tile and most recently replaced all of the cupboard knobs to add a bit of glam. We have given it a lick of paint but it's way too safe and I don't really feel like there is much very cool about this space at all. There is little wall space to hang art or accessories which makes it difficult to introduce colour that way too. I'm working on bringing in some pattern and texture through rugs but even that's difficult with two mucky pup's - are you feeling my dilemma here?
Lighting will definitely change this space and I'm after a feature over the island but again we just haven't gotten around to it yet. 

I WOULD ABSOLUTELY LOVE TO PAINT THE WALLS BLACK. 

This sounds drastic I know, but hear me out. Number 1. There is hardly any wall space to paint and Number 2. The space is very well lit with natural light so I think it could handle it. I think it would make it feel lovely and expensive and tone down the warmth of the wood if I picked the right colour. Now all that there is to do is convince Craig...

...that may take a while!
XOXO


Thursday, 14 May 2015

It's good to be back!

Phewwww it's been so long! I can't believe that I am sitting here at MIDDAY with the time to write a blog post! After the craziness of the past few weeks at uni it is such a pleasure to have time to enjoy some posting. But do you know what? I'm a little nervous! I feel like I've lost my voice, my mojo - I mean I'm pretty sure it won't take me long to get back into the swing of things but it just feels a little odd and I'm finding myself panicking about what to write! So I thought I would quite simply pick up where we left off. I remember promising to follow up with posts and thinking "Come on Christina, if you make these promises you have to stick to them and is that gonna happen?" Well, it didn't did it, and for that I am very sorry but here I am and this time I won't break the promise. 

Sooo...accessorising your home right? I shared my thoughts on colour and let you in on the magic of discovering plants. So I think what I was going to say next is how to combine these things in your home. So like I have said in the past, I am very much a learner driver in this field, but I have picked up on a few golden rules on accessorising and creating displays that I am excited to share with you. I never used to put much thought into accessorising my home, but now I do I am totally hooked, swapping things up all the time keeps things exciting. 

HERE WE GO:

1. GROUP IN ODD NUMBERS - so this age old trick runs right through design and is not only used within the home. Keep your cushions, candlesticks, vases and anything else you have on display in odd numbers, it's easier on the eye that way. 3 is often a good number but if you fancy making a little a little more impact go for 5 and really follow it through with the next few points!

2. VARY THE HEIGHT - again to keep things exciting and visually stimulating you need to lead the eye to different levels within a room or across a mantle. This could be as simple as grouping a flat book to give width, with a tall thin candle to give height, and something to fill the space in between. This trick should be applied within your rooms too. A standard lamp, a low shelf,artwork and mirrors hung at different heights will all add visual intrigue to your space.

3. UNITE YOUR GROUPS - you can group any accessories together. Anything! Thats all part of the fun. To reign it in though you could try popping them all on a lovely little silver tray or a pile of books. Not only does this make a nice little vignette but it grounds your accessories ensuring they don't end up looking like a pile of random things on your coffee table! (of course if 'lovely little silver' is not your cup of tea, go for chunky wood or distrained painterly - whatever you want.)

4. SPEAKING OF BOOKS - this has been a game changer for me, I used to hideaway my Jamie Oliver cookbooks, well not anymore. Making features of your cool books adds personality to your space. They also stop your decor feeling too uptight and contrived and make it feel magically inviting. 

5. GO UNEXPECTED - I am not as developed in this area as I'd like to be but throwing in the oddball accessory has the potential to up the anti in the cool stakes. This could be a quirky piece of art, something in a bold colour, or something from a completely different time era to the rest of your decor. By all means stick with your candlesticks and vases that you love, but too much of the same thing will make the space feel boring and predictable. Excite your guests and yourself by throwing in the unexpected. Not only will you gain cool status by doing this but it also unlocks the secret of really   loving the space you live in. If you don't try new things someday, you will end up living in the same four walls as you were 5 years ago - and that can't be exciting for anyone.

There are lots of hints and tips out there but I'm learning that these posts need to be realistic and not take over your whole evening. Take these and TRY them, what is the worst that can happen? Once you start, you'll be amazed at the thoughts you can't stop thinking. Head on over to LD pinterest page, I've created a board just for home accessories highlighting these little tricks.

XOXO
P.s I gained my voice back pretty quickly really didn't I - never has been easy to shut me up!

Sunday, 26 April 2015

Bringing the outside in, the unthought of accessory...

Good morning! It looks like it's gonna' be another sunny one - horrah! Lets pick up where we left off, Fridays post was full of promises, so here I am attempting to fulfil those.

I hope my rant about accessories got you thinking. I must stress that these posts are a total combination of the things I am picking up along my journey. Mainly from other bloggers and designers. Of course there is no right or wrong, but I am finding them to be successful in my home, and definitely feel like my own style is evolving from the hints and tips I'm reading. If you have any other ideas or thoughts I'd love you to share them too.

Anyway...

So this mystery accessory, 'TELL ME TELL ME" I hear you cry. Well I must admit, a year ago I'd never have thought I'd have done this but since I have read about plants in the home, yes you heard me, PLANTS, I think I'm becoming addicted.
They are a nifty little trick that lots of stylists (those magic makers who throw together the gorgeoussss images we drool over in the glossies), and designers use within interiors. When I first read about using them, the thought ' I'll kill them' sprung to mind, and Craig just looked at me like he had married a girl born in the wrong era. But seriously, we were in IKEA of all places and I literally thought,
'I'll pick some up while they are cheap and try it, what's to loose?'

I HAVE NEVER LOOKED BACK.

I went for cacti as I'd read about their texture which again adds intrigue and I remembered from being a kid that they didn't need much looking after. I had also seen some cool pictures of cacti on Abigail Aherns pinterest. I did opt for the real thing, however, many of these stylists and designers I speak so highly of really do champion faux.

They seriously add something to a space that no other plastic, metal, glass, you name it can add. Its marvellous! And not just plants but flowers too! Although this is something I haven't actually gotten round to yet. I'm desperate for some faux flowers though but I want to get the rooms a little more finished before I invest in some good quality ones.

So have a look about, I guarantee once you've tried a few you'll catch on to this. Our go-to girl Abigail Ahern does some AMAZING fauxs, obviously! But I did find IKEA to be pretty good, and cheap too. If you shop about online there are plenty of places selling them, and your trusty home retailers like M & S, John Lewis, and Dunelm all sell them. Steer clear of anything unnatural looking and from what I've found I'd say greenery is a safe place to start.

This is really not my area of expertise so even though I'm happy to share with you my advice on going for it and how it's inspired me, I'm not going to claim I'm an expert flower arranger 'cos I'm not! So I'd say if you try it and think it's for you, have a read of this blog. You could even speak to your florist about how to arrange displays and ask if they can get hold of some good quality fauxs for you. I'm off to see Rebecca at my local as soon as I get around to it - it's another job on the list!

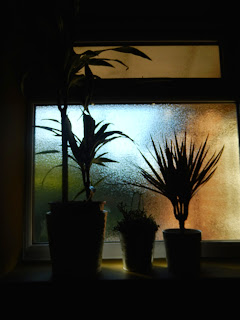
Enjoy the rest of the weekend, tonight I'll be sharing my pick of the best accessories for May/ July and a few tips on what to do with them in your home. I've popped up a few pics of the start of my collection, it is only very small at the minute but I'm planning on expanding :) I'm loving using them in bathrooms and you can't tell so much in the snap as it was a little dark this morning when I took it and we haven't finished with the lighting in there, but rather than fitting a blind I want to create a natural screen using lots of varying heights of plants.

XOXO.